Showing posts with label DIY. Show all posts

Monday, November 10, 2014

DIY Fencing from local greenwaste.

Today we made three metres of fencing / screening from greenwaste from the swampy area not far from our home.   I had wanted to make something that would break the wind off the ocean while enjoying the view still. 

Brice hammered in the three stakes for my loom guides and we set up off the back fence and began to weave the fencing.  Yesterday we collected all the wood and carried that back home and today we went back for more.  There is a steady supply of this material locally.

Me standing next to the fence loom with some unfinished fencing.
This is going to be a permanent set up in my yard.  The imagination is all that limits one with this project.  I have many many ideas I want to try out that have been running through my mind for a long time now. 

I weave baskets and so I would also like to make the twine for the fencing myself from materials from the surrounding bushland, then the project is completely all made from raw materials from the bush. 

Today,  we used heavy duty string on a ball because I was impatient to start this project.  I will make a supply of homemade jute  and have that ready for my next phase of fence weaving.

If hardwood straight sticks were used and fishing line to weave, it would be very strong and you could make a sleeping hammock from this so that you were up off the ground in any wet weather in the bush.  

There are many long grasses and reeds as well as the obvious skinny bamboo that one could use to construct shelter, screening, bedding or garden surrounds.
To learn how to do this I watched a Youtube video and followed all of the guys instructions and it worked perfectly.  Here is the video:

Images @ Eminpee Fotography

Saturday, October 11, 2014

DIY - Stoves in a hurry!

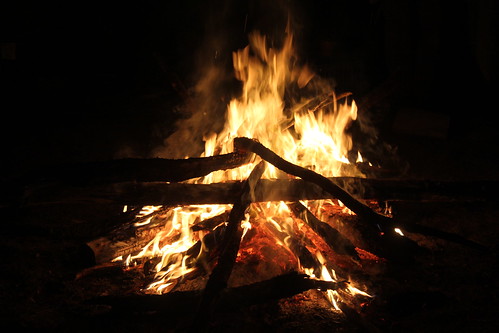
IMG 2263 Fire at Dayne's Place
fire
Besser blocks are so plentiful, usually people have a few hanging around behind the shed or under the house.  This is the reason we decided to make one.  I love to make things from what ever I can and I want too show my kids that they can too if they read this blog one day. 
The idea is so easy with just four Besser concrete blocks and a couple of minutes of your time and you can be cooking on your outdoor stove and enjoying this. 

This type of rocket stove comes in handy if the electricity is off or if you have no money to pay the bill but you still have to cook for your children.  Take control of the situation instead of looking for a handout because of bad budgeting procedures and build a rocket stove.  Cooking fires are not illegal if they are tended at all times and are used for cooking.


Images @ Eminpee Fotography

Monday, September 29, 2014

Building a hot water heater powered by the Sun.

The Sun is electric and it beams its energy down here one block after another akin to how we walk ... one foot after the other.  This tells us the story of how it works.

I am always interested to find DIY projects that can be made from recycled goods that have been discarded as rubbish.  We discard way too much and here is one of the biggest reasons we are in the materialism spiral down.  Its an addiction.  It is an addiction like a drug/substance, only here the substance is "STUFF" - people are addicted to buying stuff.
BioEthanol for Sustainable Transport
BioEthanol for Sustainable Transport (Photo credit: Wikipedia)

Build your own solar thermal panel.

I found this website that has the instructions for building a solar thermal heating unit from next to nothing and at first I was going to just link to it and I will but I also decided to copy down the instructions because they were that good and because I don't want to lose it if the web site goes down.  It isn't easy to find how to's that are this straight forward.  I am hoping I get to have a go at doing this soon myself. 
CLICK HERE FOR INSTRUCTIONS FROM The Sietch
English: Duct Tape
English: Duct Tape (Photo credit: Wikipedia)

Materials needed:

  • Water
  • 2 buckets
  • Drill (with both drill bits and screw bits)
  • Some scissors
  • A saw (a simple hand saw will do)
  • Some wood
  • A pane of glass.
  • The back of a small refrigerator.
  • 12 feet of air pump hose used in fish tanks
  • Backing material (we used an old door mat)
  • A box of wood screws
  • Aluminum Foil
  • Role of duct tape
  • Angle Cutter (or hack saw)
The end result is fabulous - From The Sietch
 Time:
This project took about 3 hours of constructions time. It took a couple weeks to find all the parts.
kkhttps://www.flickr.com/photos/melonpopzdropz/15245021959

Images @ Eminpee Fotography

Saturday, February 15, 2014

Portable Chicken Coops

~  From Fresh Eggs Daily ~

Photo: Okay this is a pretty neat way to repurpose a swing set, but I would have left the swings in! Have you headed over to Fowl Play Products to check out the chicken swings over there? 
Photo source: Garden Wise Living
https://www.facebook.com/FreshEggsDaily Photo source: Garden Wise Living
Okay this is a pretty neat way to re purpose a swing set, but I would have left the swings in! Have you headed over to Fowl Play Products to check out the chicken swings over there?
I want to have chooks so I love all of these contraptions to house them there are only the limits of your imagination.

IMG 5906

This looks very cook but costs quite a bit but it is well put together though.

IMG 5811 Hello Phoenix
Phoenix might chase chooks!
IMG 5899

Images @ Eminpee Fotography
Enhanced by Zemanta

Friday, May 03, 2013

How to Shoot Dawn Shots made simple.

Urunga at Dawn is something heavenly.

IMG 4786 Smash of Dawn Colours  
Ten helpful tips by a super photographer Heather Angel on shooting dawn shots.
1. Check time of sunrise or sunset and aim to get on site well beforehand so you have time to select the best camera angle and lens. Remember to pack a flashlight – particularly in the morning.
 2. Use the brief time when the sky is lit indirectly by a magical alpenglow, before the sun rises or just after it sets, as clouds and snow-capped mountains are painted with a rosy glow that may also be reflected in water.
3. To increase the depth of field of a static subject and to soften moving water, use a long exposure with the camera on a tripod.
4. If including active wildlife in the shot, either go for a slow shutter speed to gain creative blur, or push up the ISO.
5. To balance out the exposure between a bright sky above and a darker scene below either use a grad neutral density filter or bracket the exposures and combine using HDR.
6. Use people to provide scale alongside tall buildings or on bridges.

7. Reduce risk of camera movement spoiling a shot
  • use a remote release or a self-timer
  • lock up the mirror
  • add extra weight to the tripod center column
8. If there is not enough light on a foreground subject, paint with a continuous LED light.
9. Look for shapely silhouettes to set off against a colorful sky.
10. Use a long lens to find a picture within a picture.
by Heather Angel PIXIQ
 Images @ Melonpopzdropz  Flickr

Sunday, October 28, 2012

Recipe for Homemade mascara

Mascara
Mascara (Photo credit: Wikipedia)
What is in mascara anyway?Mascara dates back to ancient Eygpt. Most formulas contain the same basic elements: pigmentation, oils, and waxes. But most mascaras on the market these days have plenty of other “stuff” lurking about them.

Cosmetics are very loosely regulated by the FDA. There is a great deal of freedom for the beauty industry in the formulation of cosmetics. There are some concern for some ingredients found in mascara since they have been found to cause cancer in mice, and others are known to be highly toxic to the human body.
So why not homemade mascara?

DIY all natural homemade mascara

All natural homemade mascara.

Ingredients:
2 tsp coconut oil
4 tsp aloe vera gel
1/2 tsp grated bees wax (grate then measure)
1 – 2 capsules of activated charcoal*
a clean mascara container
*Activated charcoal can be found in most health food stores or online.
This is not the same stuff you use to get your grill going, okay?


Method:

1. Put coconut oil, aloe vera gel, and grated bees wax in a small saucepan over low heat. Stir until beeswax is completely melted.
2. Open 1 – 2 capsules of activated charcoal (depending on desired color, about 1/4 – 1/2 tsp) and pour into oil mixture. Stir until completely incorporated. Remove from heat.
3. Pour into a small plastic bag, pushing the mixture down to one corner. Then cut a very small hole in the opposite corner of the bag. I do this exactly the same when piping icing or chocolate.
4. Fill and empty mascara bottle easily from the bag with the hole in the corner.
Thank Your Body - A  Journey to Real Health
Enhanced by Zemanta